This guide describes how to get started with the Verkada API. If you want some inspiration for what you can build, check out our Example Use Cases.
Learn how to get started with the Verkada API
Time to complete: 15min
API Keys
Verkada’s API follows a two-factor authentication approach through the use of two different key types: a top-level API Key and a short-lived API Token. API Keys are created by Verkada Org Admins directly from within their Command Admin settings. Each API Key can have a unique permission set, broken down by Product and “Critical Endpoints”. Critical Endpoints are defined as high-vulnerability endpoints that allow critical control of Verkada devices, such as the Streaming API and Camera Audio API.
Using the top-level API Keys, users are able to generate short-lived API Tokens, valid for 30 minutes, that are required in order to authenticate at the endpoint level. It is important to store API Keys and API Tokens in a secure location, similar to your username and password. If a malicious user were to gain access to your API Key and API Tokens, they would gain a high-level of access to the creation or deletion of certain entities in your organization (ex. profiles of interest, access users, etc..).
Only organization admins have the ability to create API Keys (maximum of 10 API Keys per organization). Without Organization Admin permissions, users will not have access to the Verkada API page in Command. Upon creating an API Key, org admins will have the option to select between two different permission sets for each product line.
- Read-only access - used solely to retrieve information from Command (ex. alerts, people count, etc..).
- Read/Write access - used to both retrieve information from Command as well as post new information to the organization (ex. create a POI profile, create Helix events, etc...).
All changes to an API Key or a Webhook config are audit logged.
Step 1: Generating an API Key
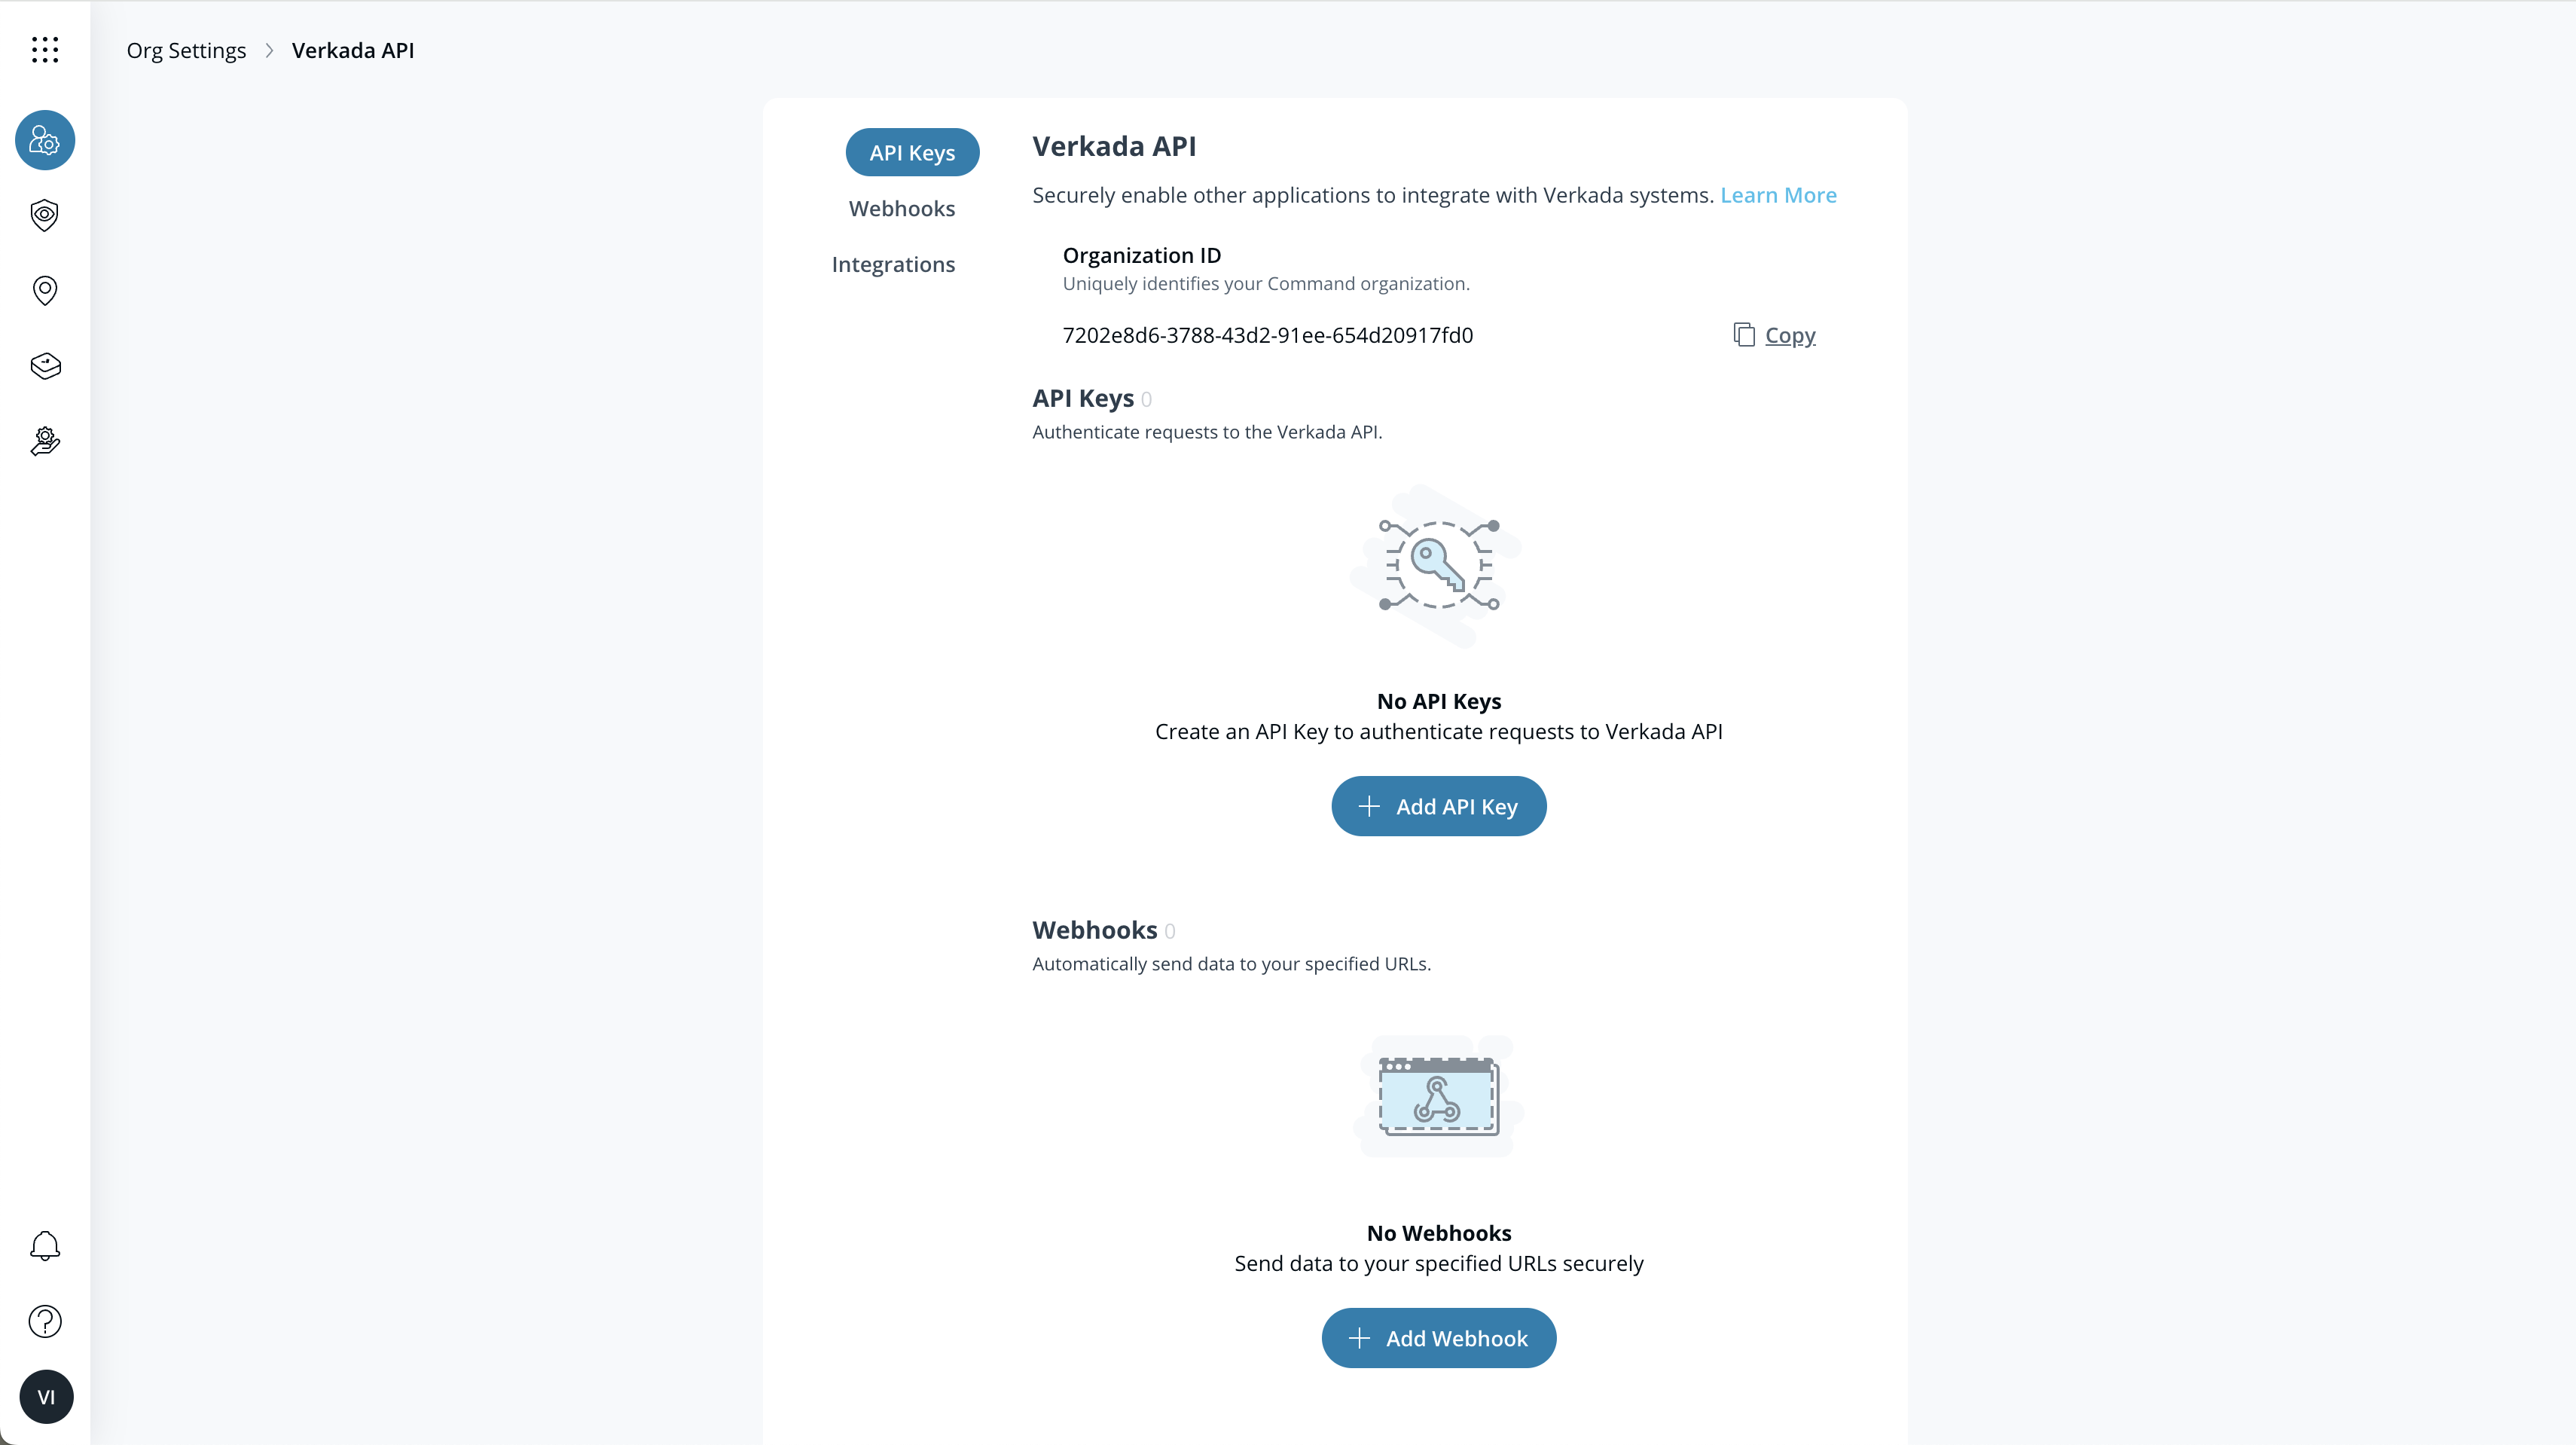
To create a new API Key (Organization Admin only), navigate to the Verkada API tab under the Organization Settings page. Click the '+ New API Key' button to add a new API Key for your organization.
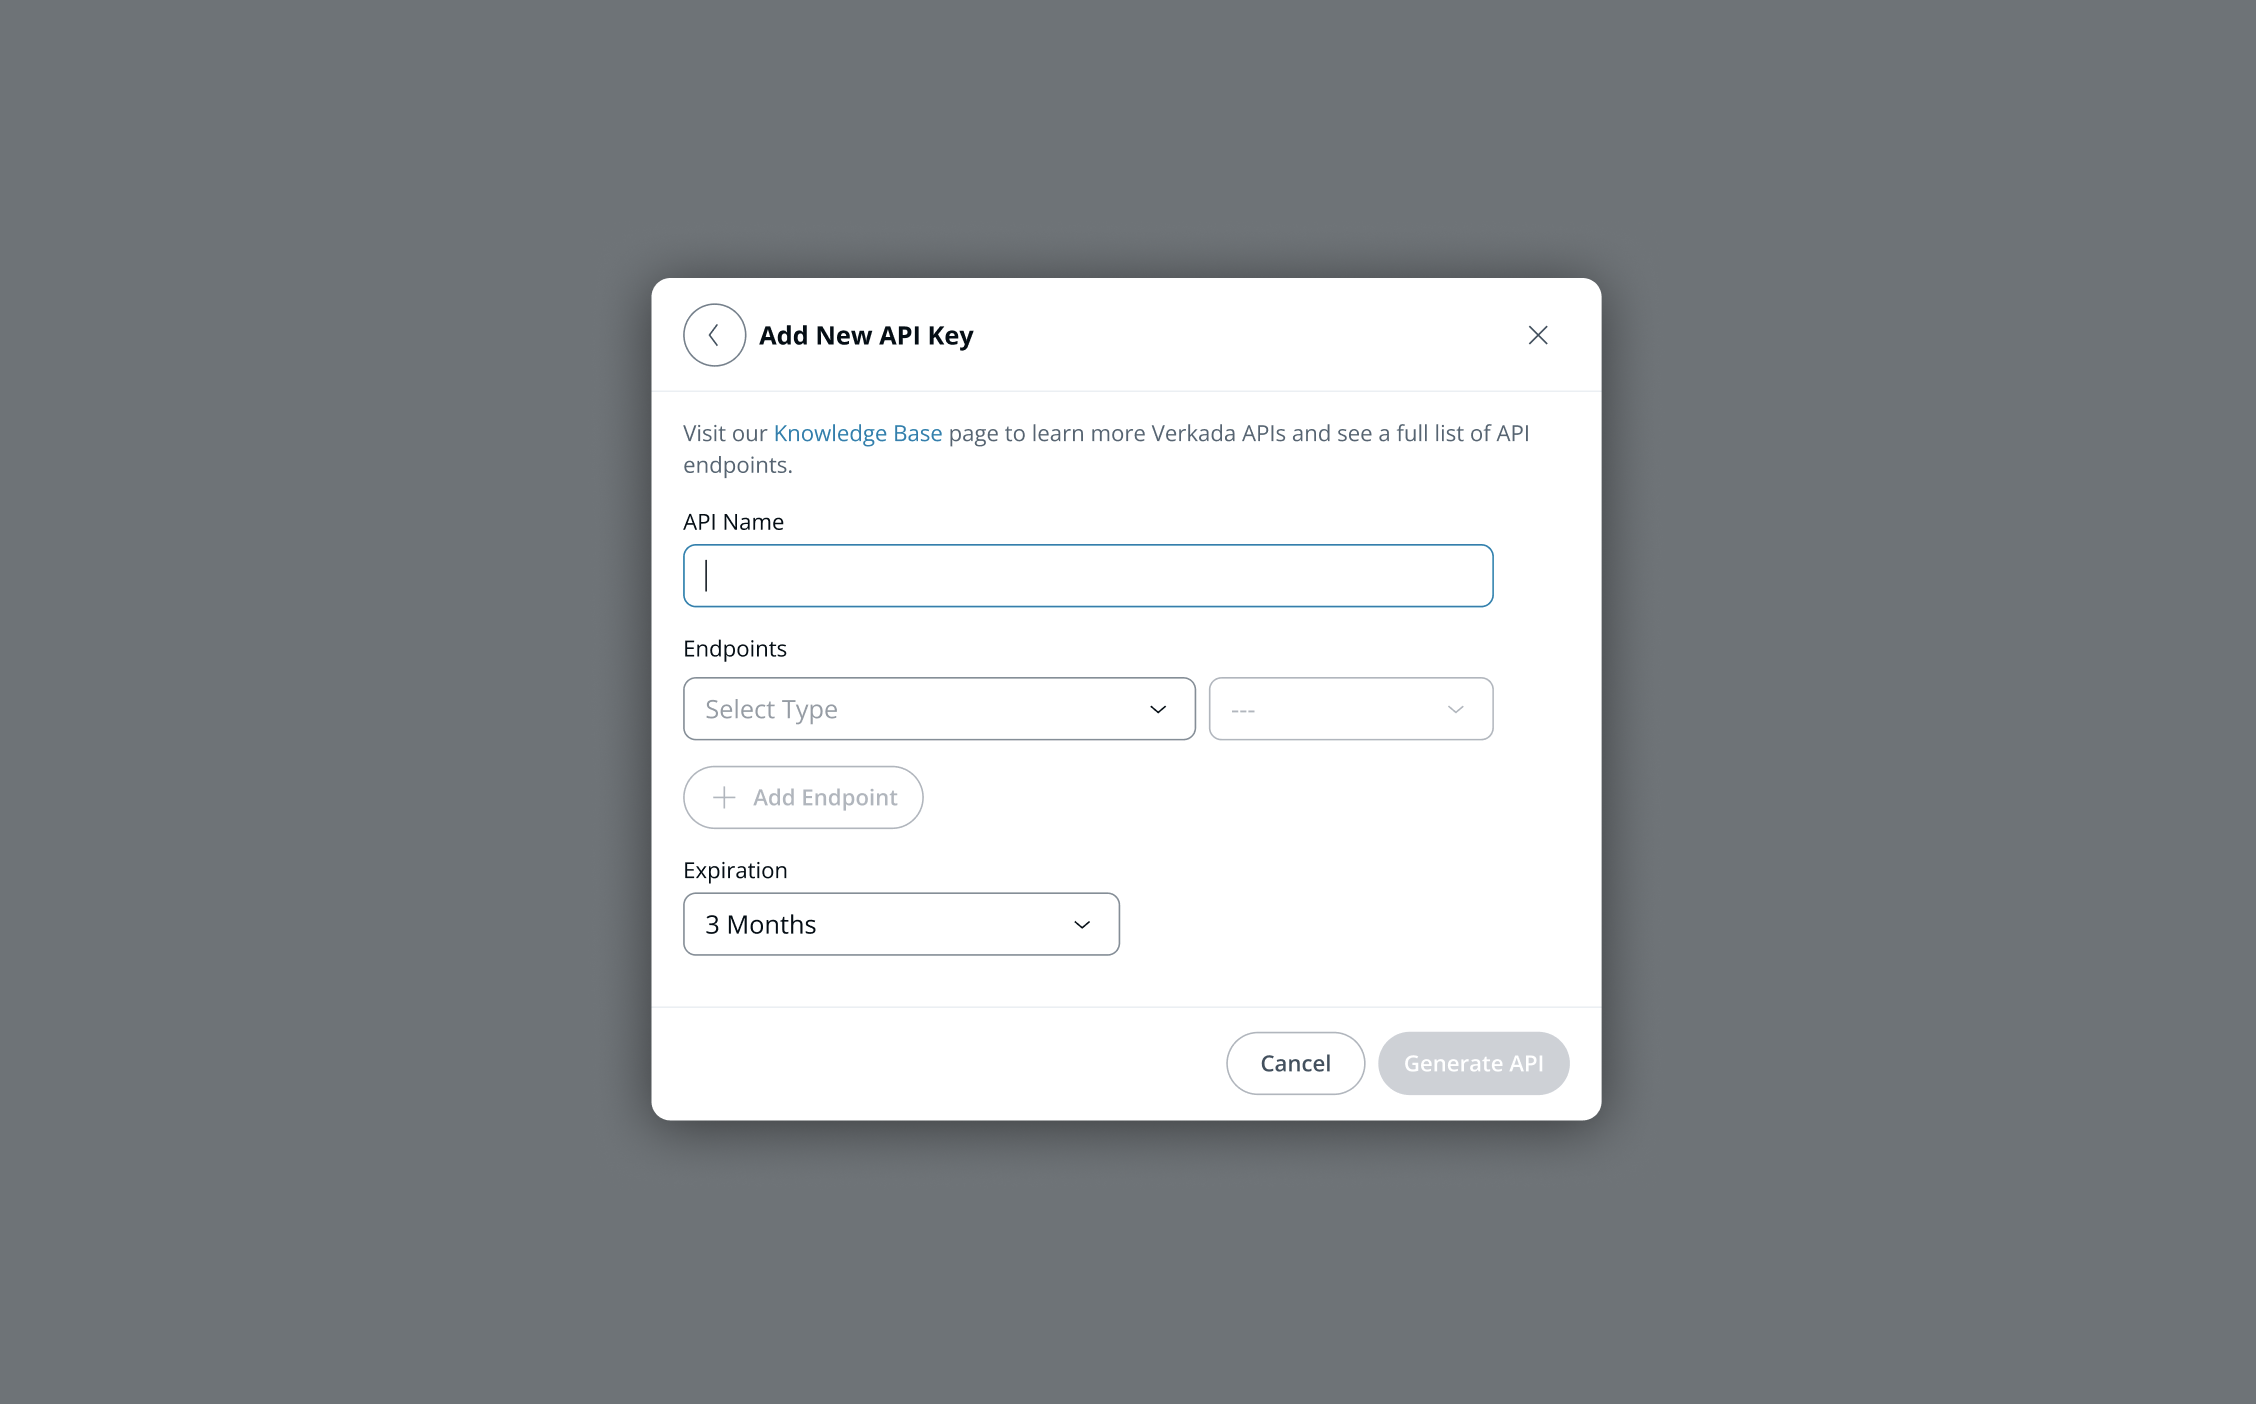
You will then be prompted to provide a name for the API Key you are creating. Adding a name facilitates the management of your various keys throughout your organization. With that said, we recommend only creating API Keys when required and reusing the same key for different applications as much as possible.
After naming the key, users will need to define the permission scope for the API Key in question. It is important to think about the endpoint(s) that will be called using this key to properly define the scope. If you are unsure about the permission level required for your project, keep in mind that any GET endpoint requires at minimum Read-Only access, while POST, PUT, UPDATE, and DELETE endpoints will require Read-Write access.
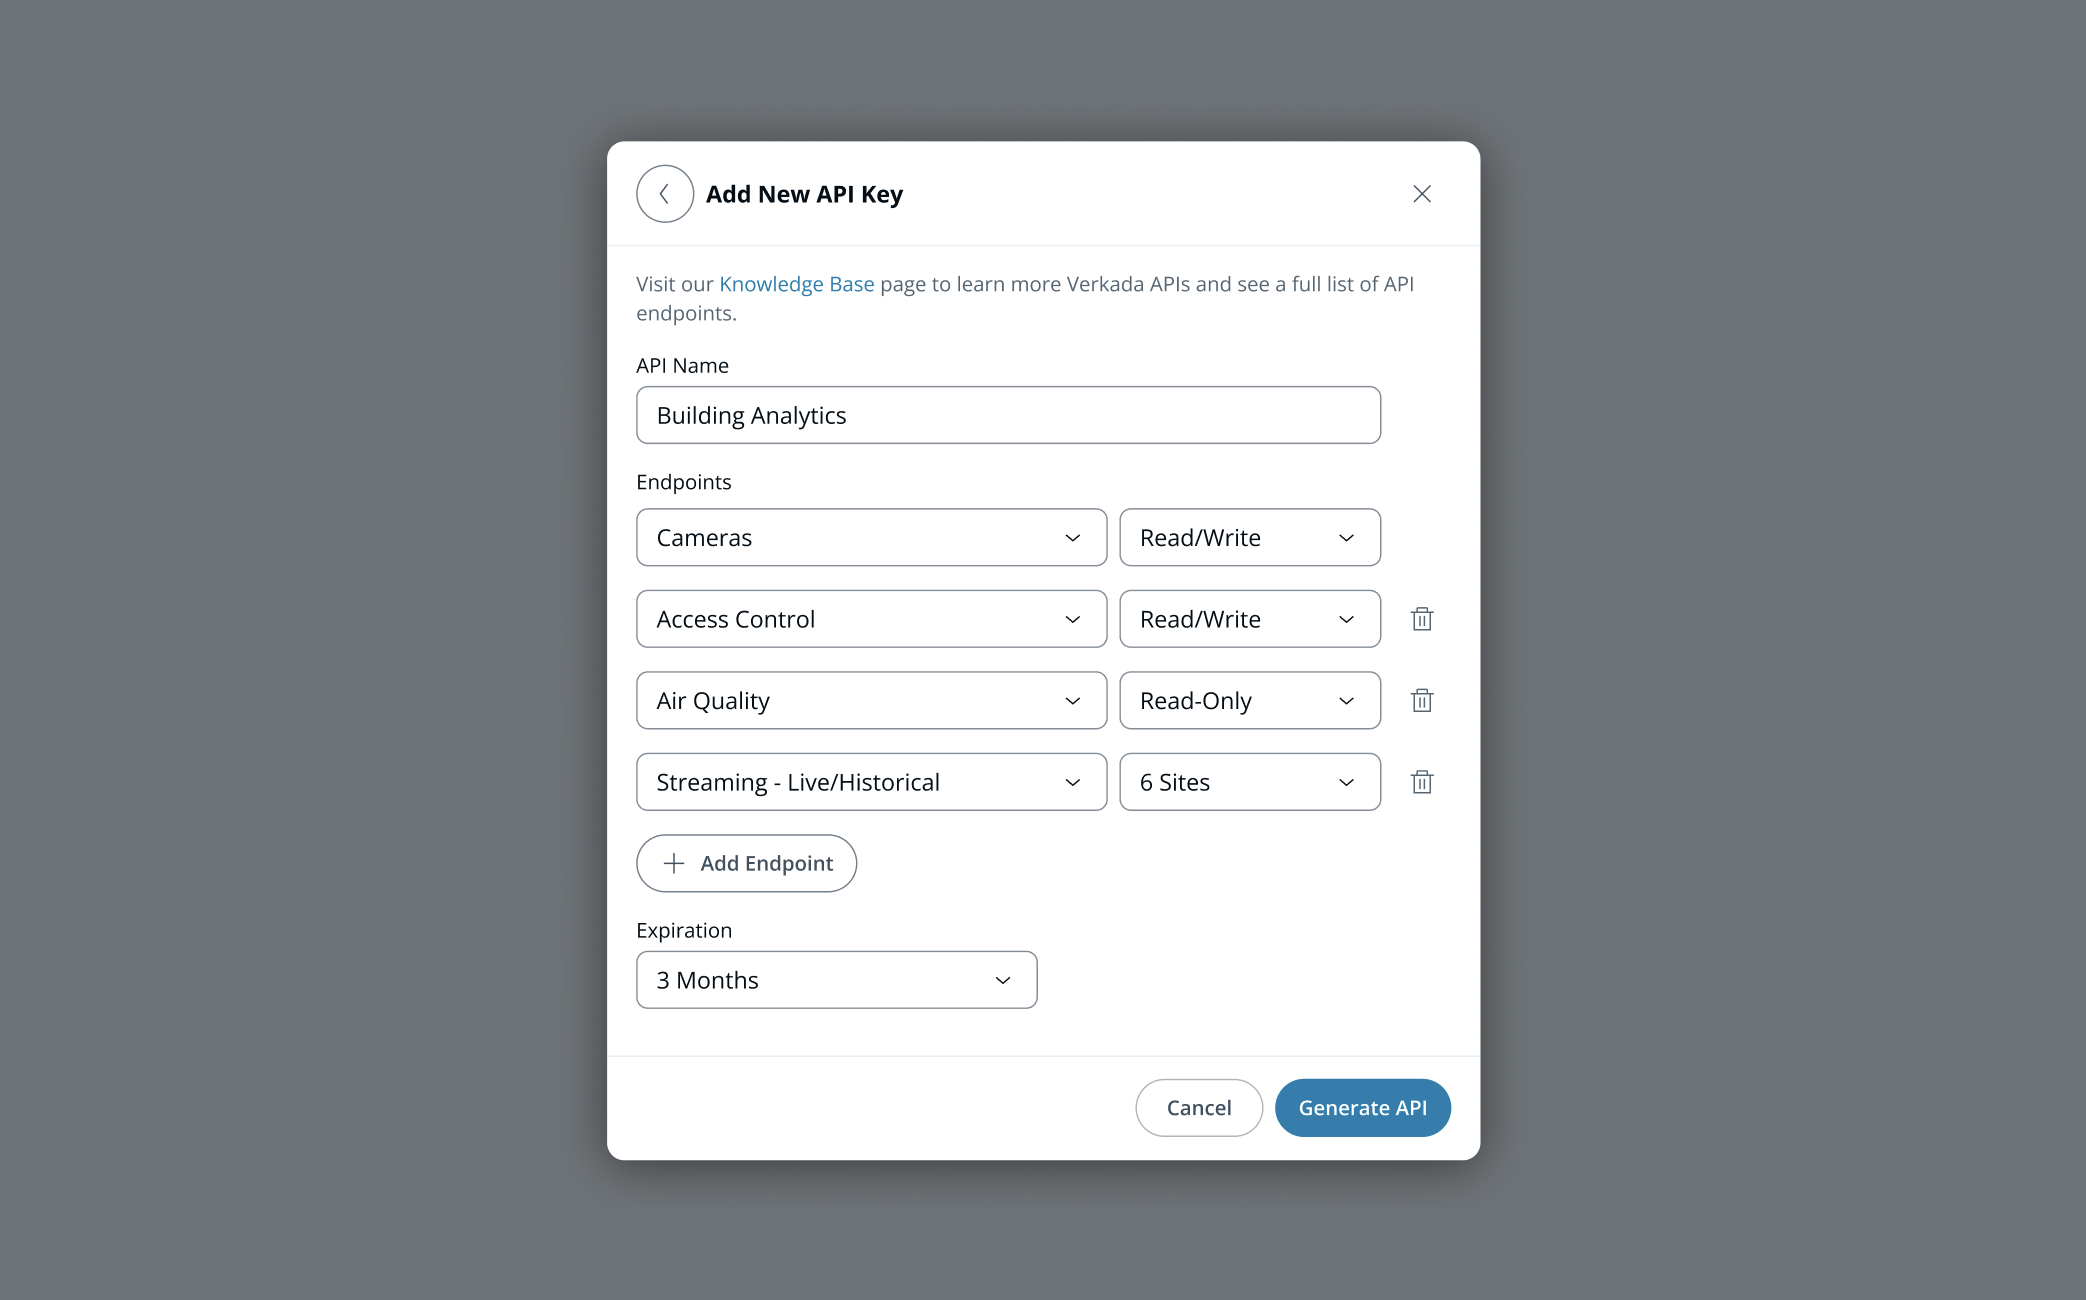
Once the key scope has been finalized, set the key expiration and click “Generate Key”. Note - API Key permissions cannot be edited once the key has been created. Ensure you are satisfied with the permission scope before proceeding.
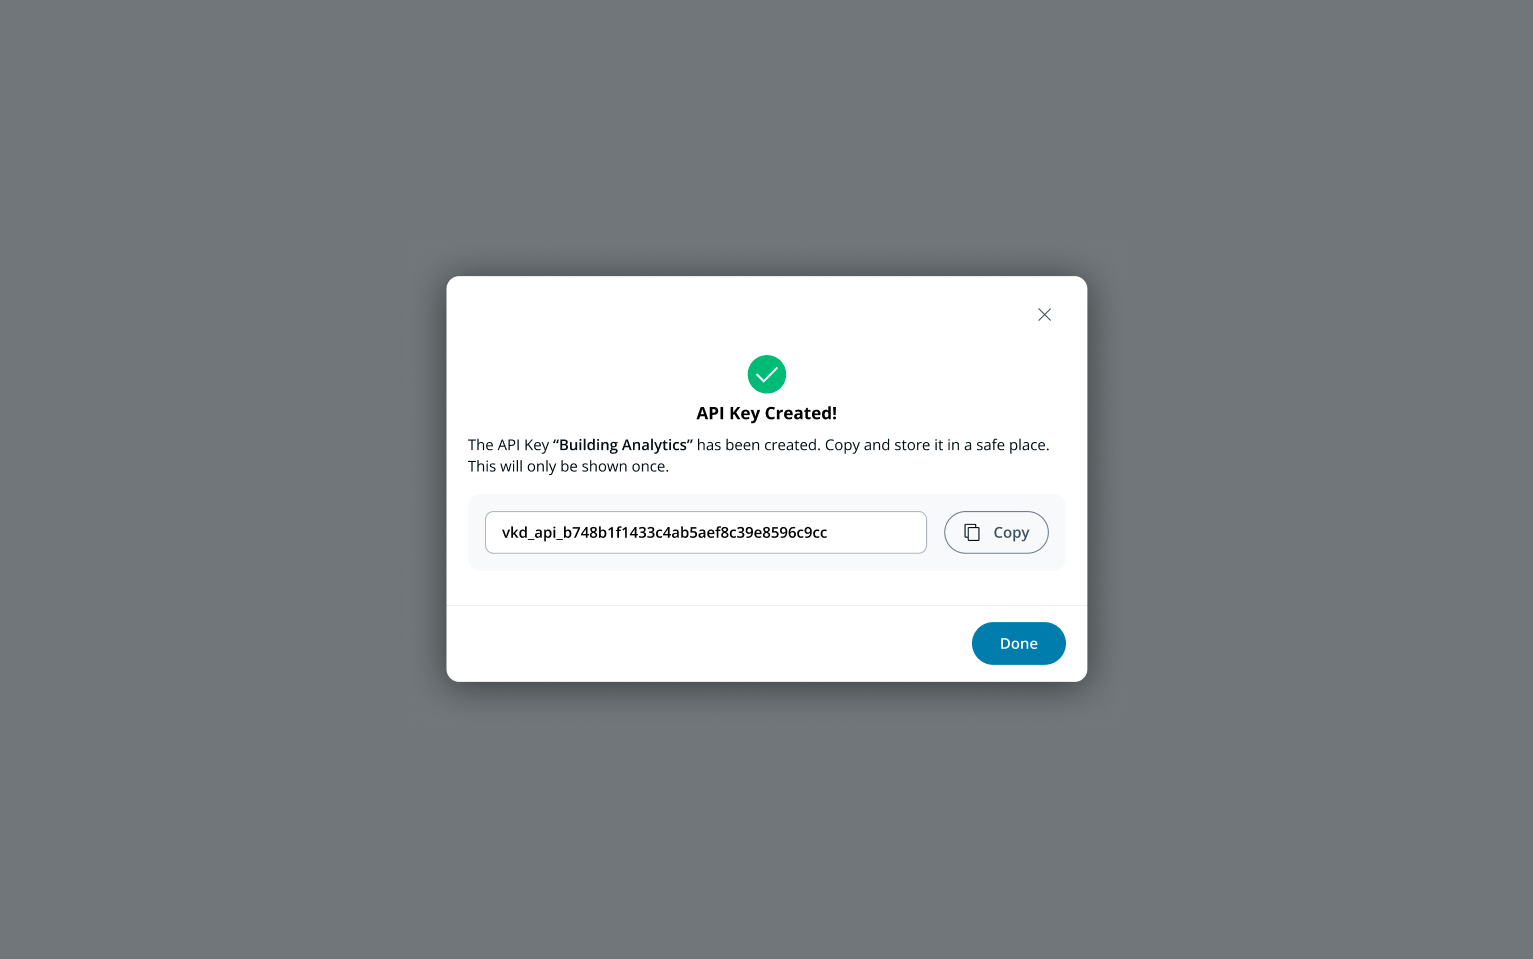
Clicking on "Generate API Key" will result in the API Key being displayed on the screen. This step is the only time that the API Key will be displayed in Command, so make sure to copy it and store it in a secure location for future use.
Step 2: Generating an API Token
After creating the top-level API Key, users will need to call the following endpoint to obtain an API Token: https://api.verkada.com/token
curl --request POST \
     --url https://api.verkada.com/token \
     --header 'accept: application/json' \
     --header 'x-api-key: API_KEY'
If you are a EU-based customer, the API endpoint would be https://api.eu.verkada.com/token and the request would look like the following:
curl --request POST \
     --url https://api.eu.verkada.com/token \
     --header 'accept: application/json' \
     --header 'x-api-key: API_KEY'
This will return an API Token in the following format, valid for 30 minutes.
{"token":"api_token"}Step 3: Making an API request
All API requests must be made over HTTPS. API authentication is performed using your API Token as the header (x-verkada-auth) in the path to all endpoints.
To get a list of all your cameras from a US based Command organization, use your API Token as the header and call the following endpoint:
https://api.verkada.com/cameras/v1/alerts
curl --request GET \
     --url 'https://api.verkada.com/cameras/v1/alerts' \
     --header 'accept: application/json' \
     --header 'x-verkada-auth: API_TOKEN'
If you are a EU-based customer, the API endpoint would be https://api.eu.verkada.com/cameras/v1/devices and the request would look like the following:
curl --request GET \
     --url 'https://api.eu.verkada.com/cameras/v1/alerts' \
     --header 'accept: application/json' \
--header 'x-verkada-auth: API_TOKEN'{
"next_page_token": "string",
"notifications": [
{
"camera_id": "string",
"created": 0,
"crowd_threshold": 0,
"image_url": "string",
"notification_type": "string",
"objects": [
"string"
],
"person_label": "string",
"video_url": "string"
}
]
}Congratulations, you are now successfully set up with Verkada APIs, and should be ready to build your own application!